I will show you how to append data from two tables or data sources into one table, with a slight workaround.
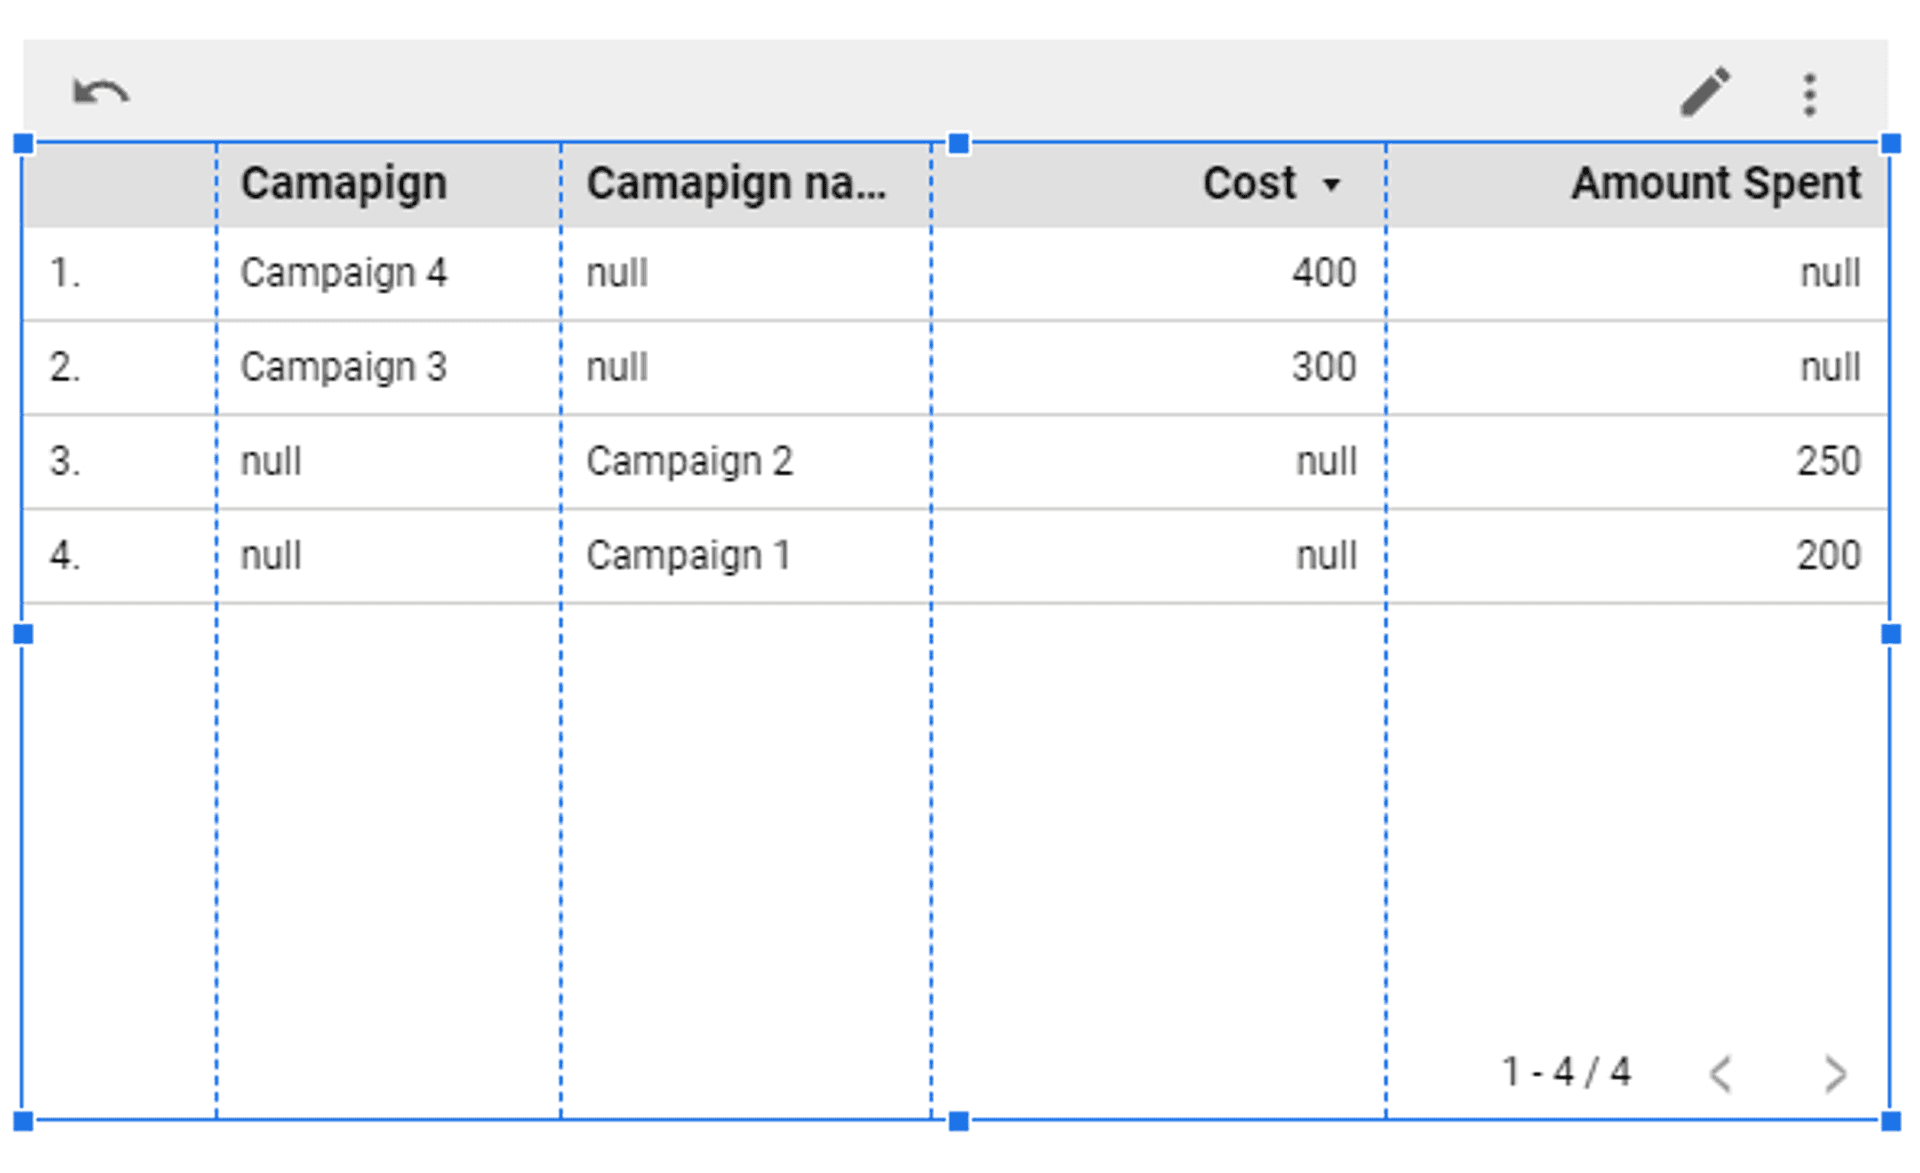
Your data from two merged tables will look like this: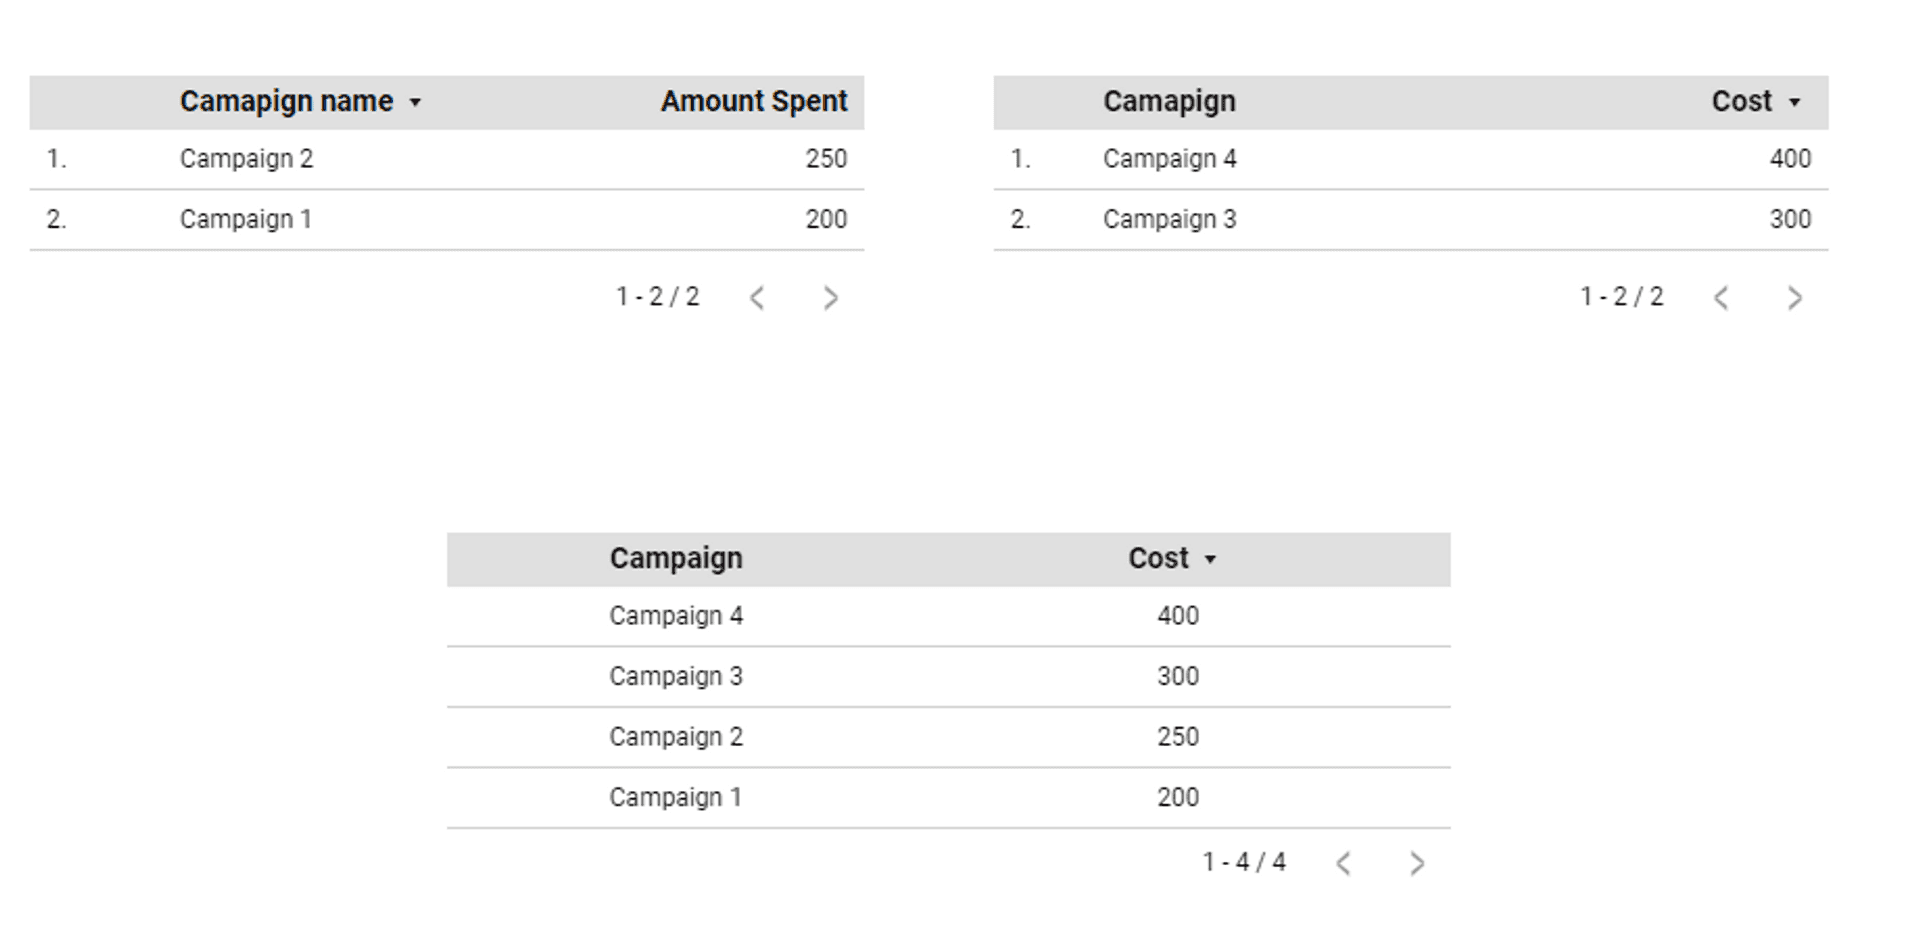
Watch my video tutorial or check out the written guide with screenshots below the video.
Step 1: Insert a New Table
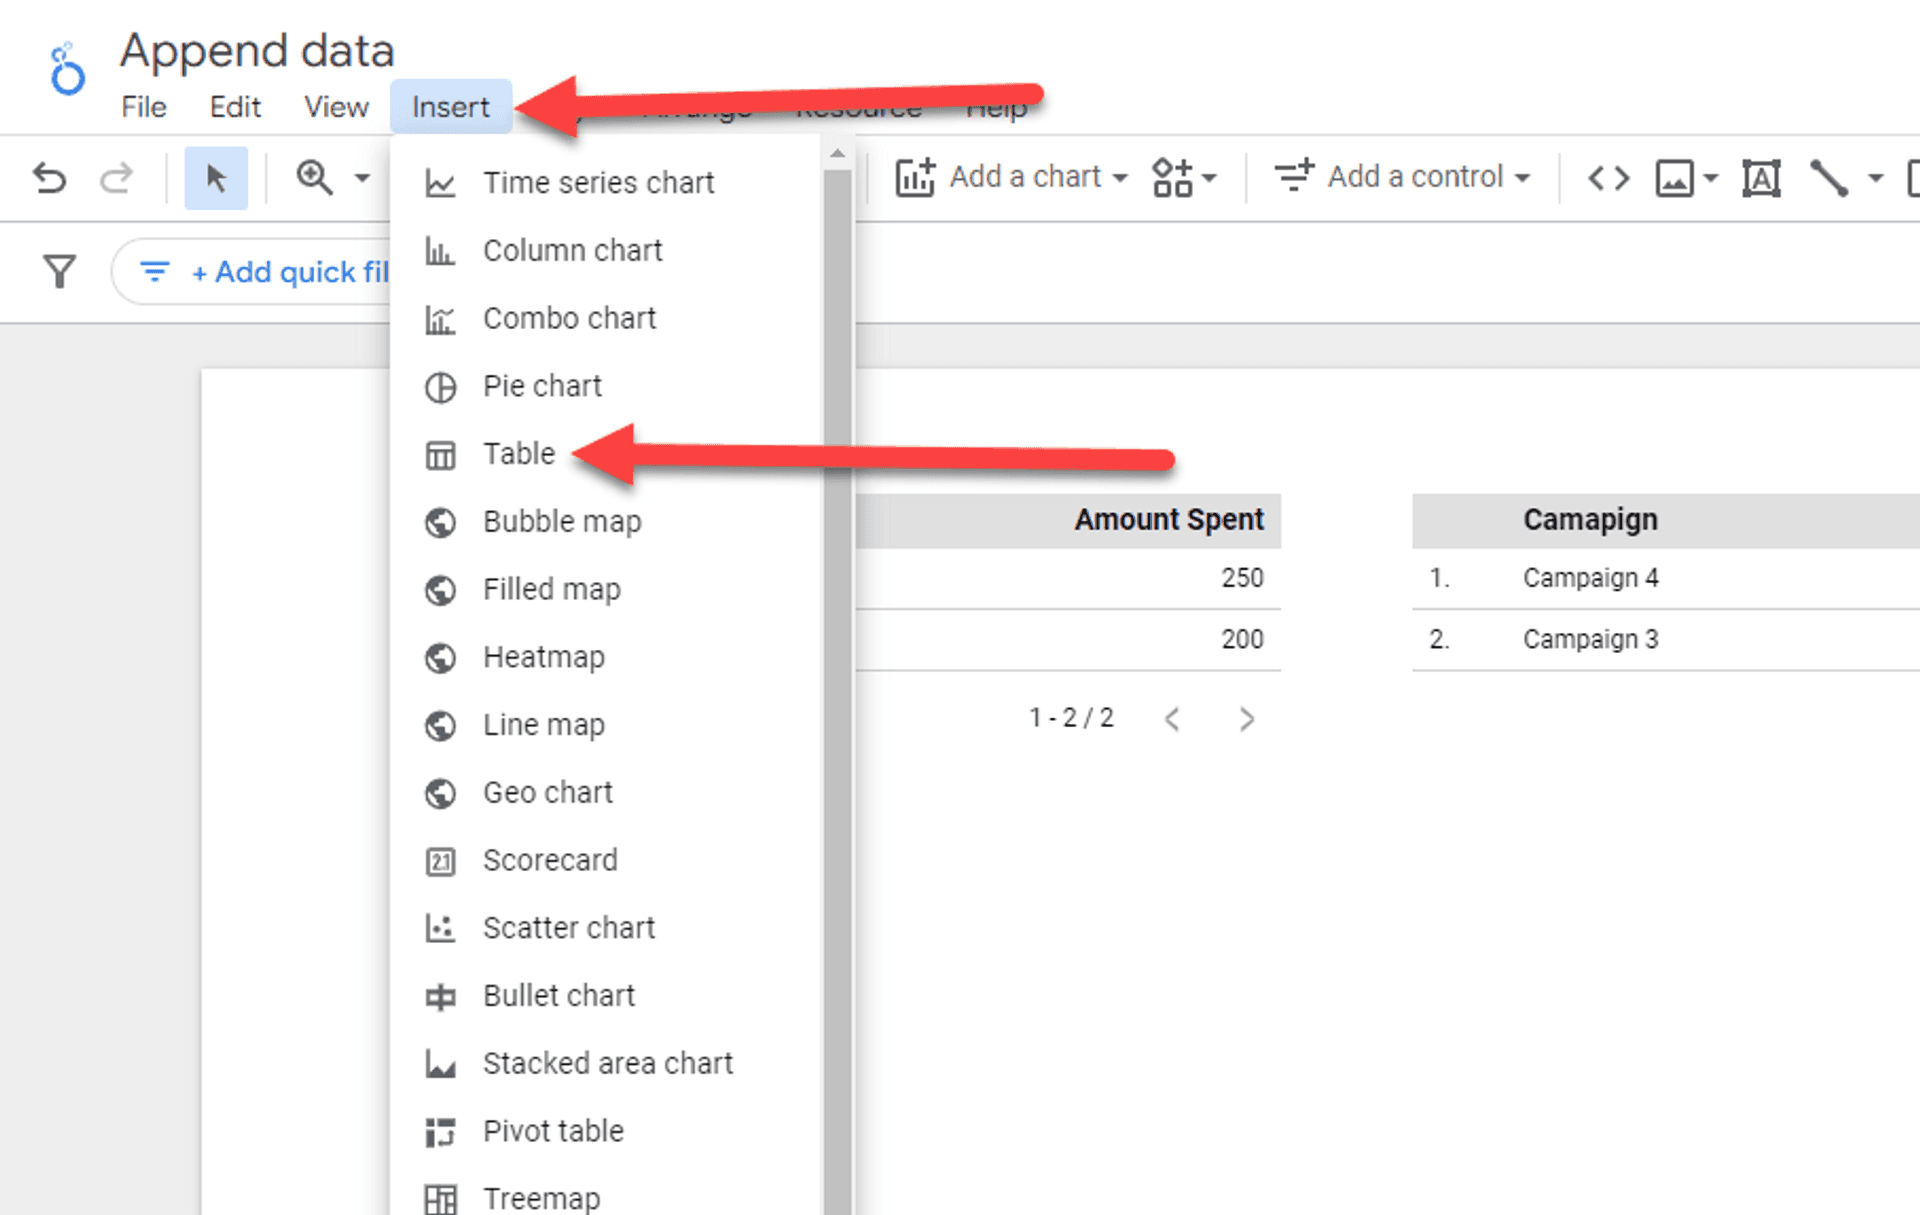
Insert a Table:
- In your Looker Studio report, click Insert from the top menu.
- Select Table from the dropdown.
- Click anywhere on your report canvas to place the table.
Select the Table:
- Click on the table you just inserted to select it.
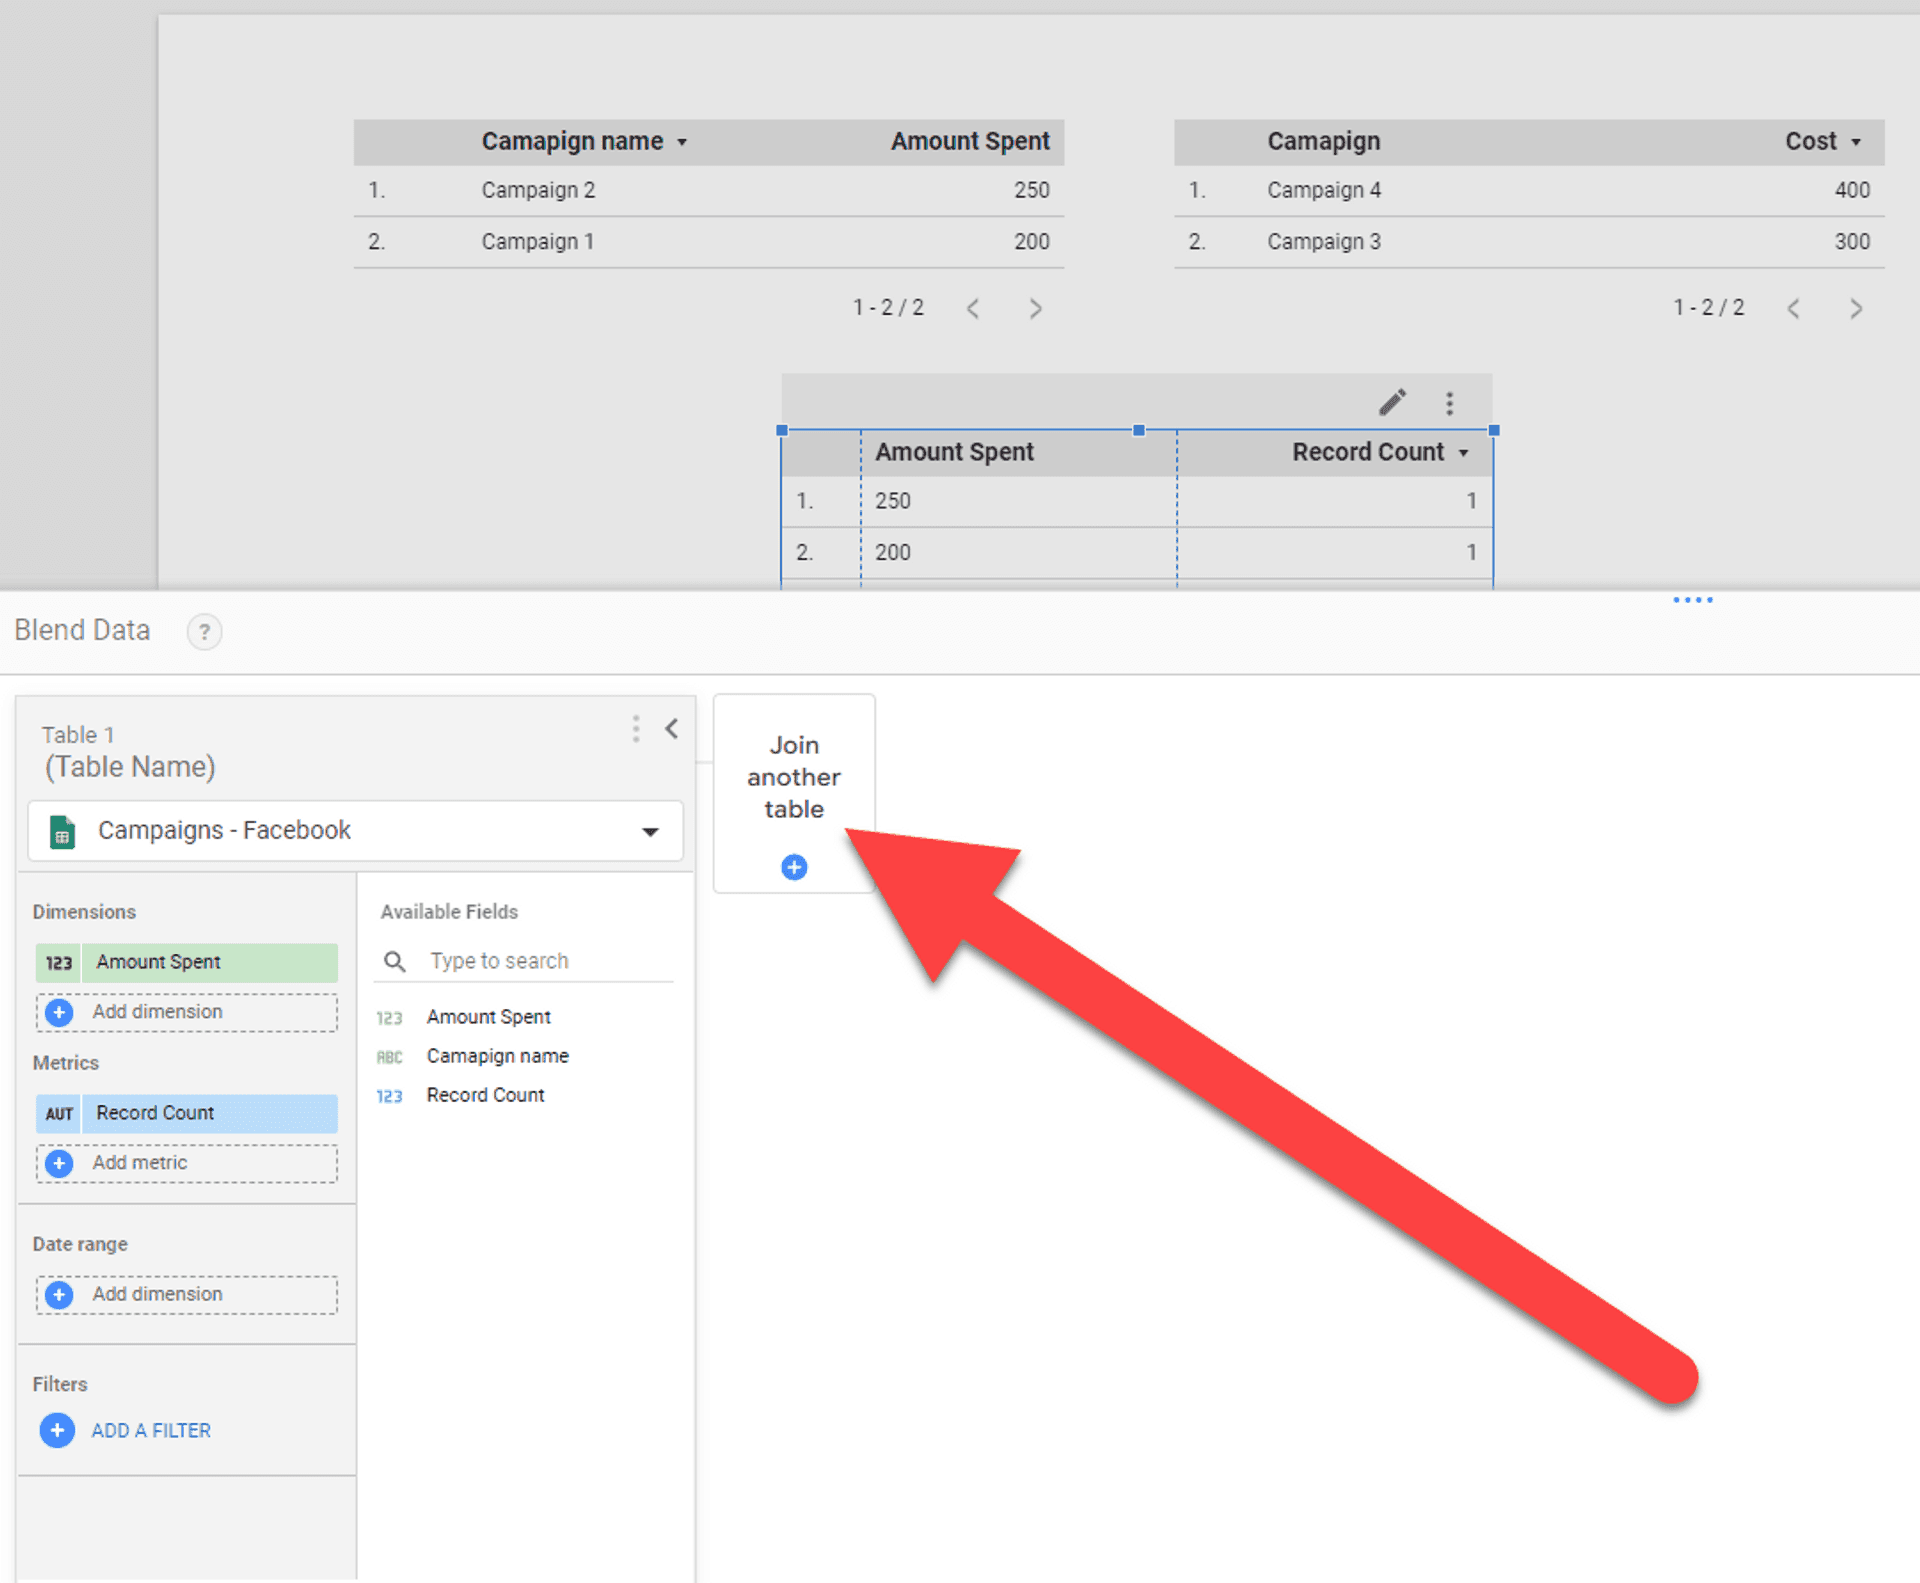
Step 2: Blend Data
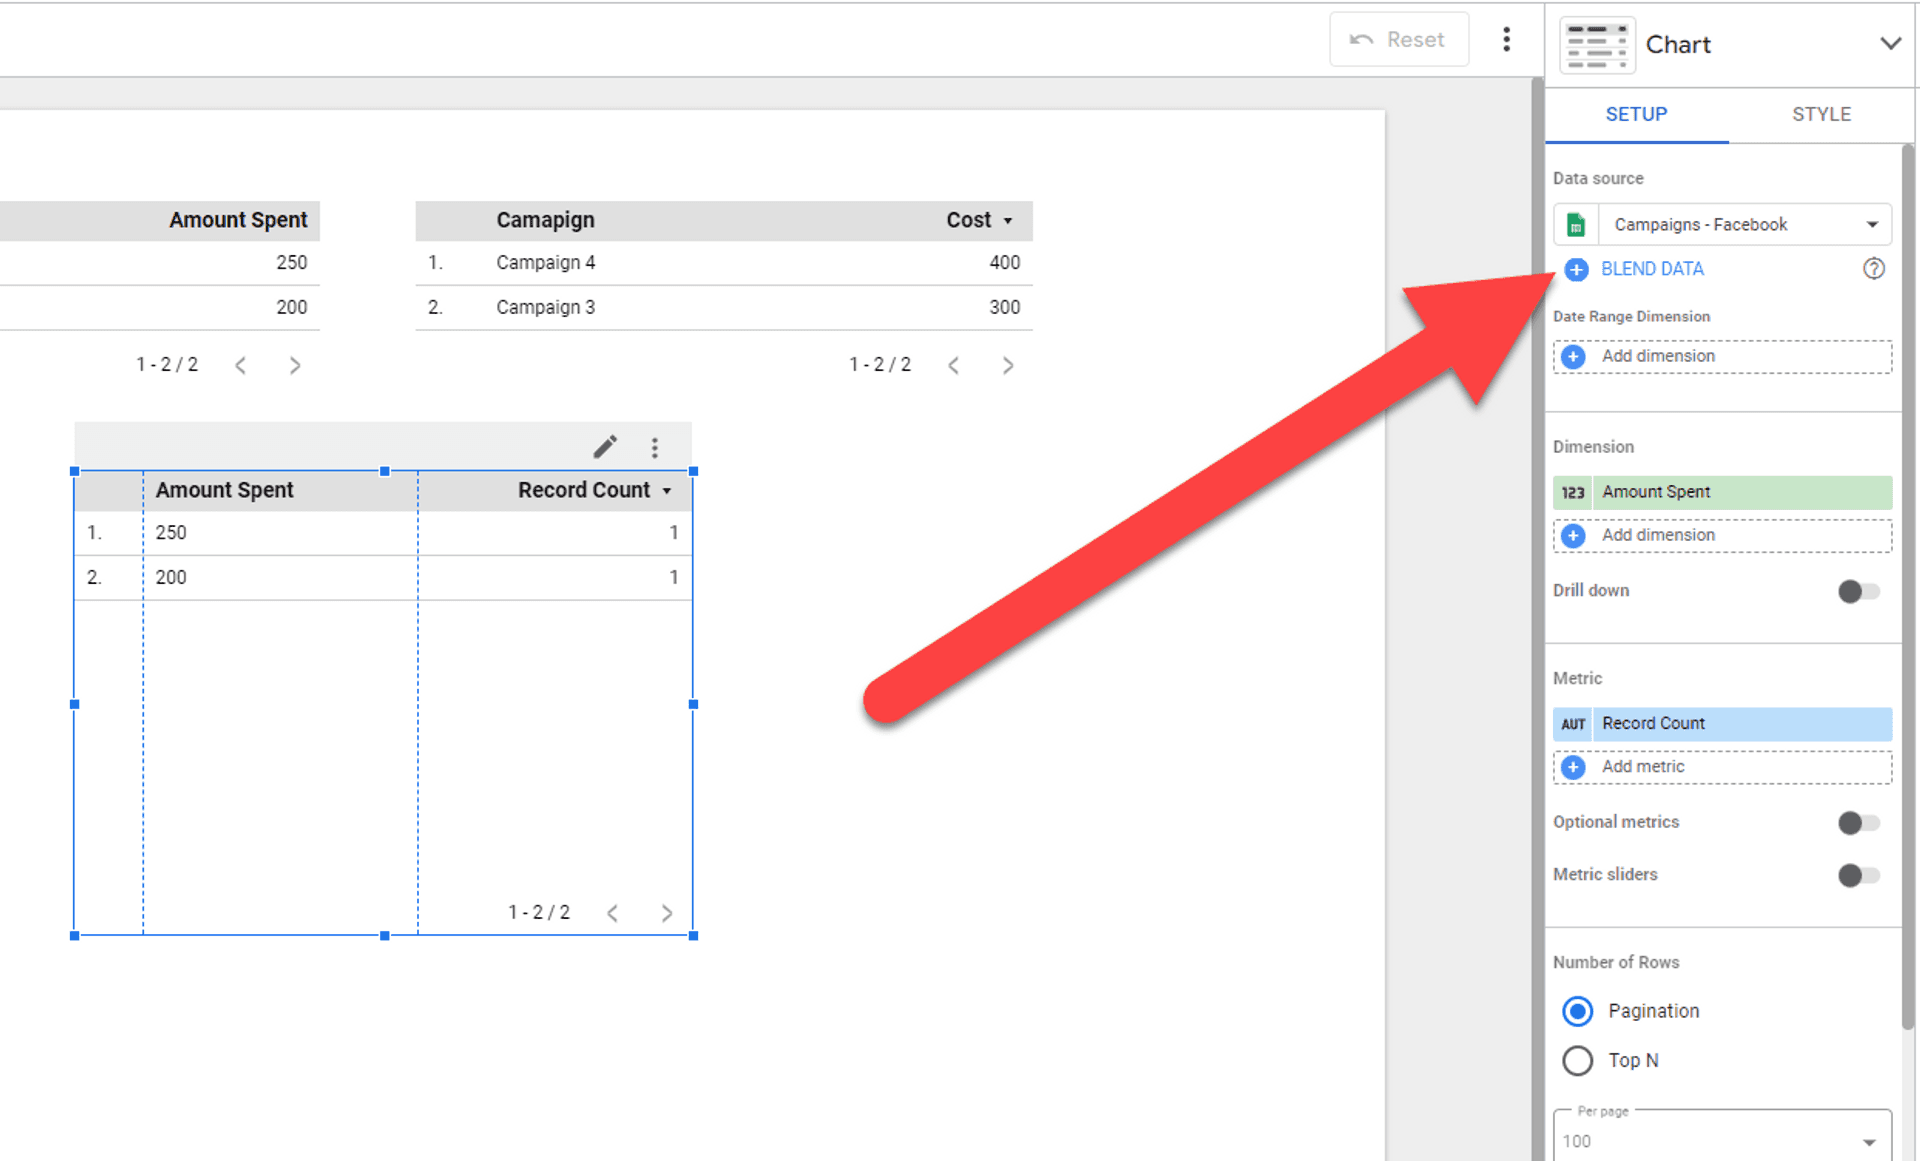
Find the Blend Data Option:
- With the table selected, go to the right-hand panel.
- Find the BLEND DATA option and click on it.
Step 3: Select Data Sources
Choose the First Table:
- Choose your primary data source (the main table for your blend).
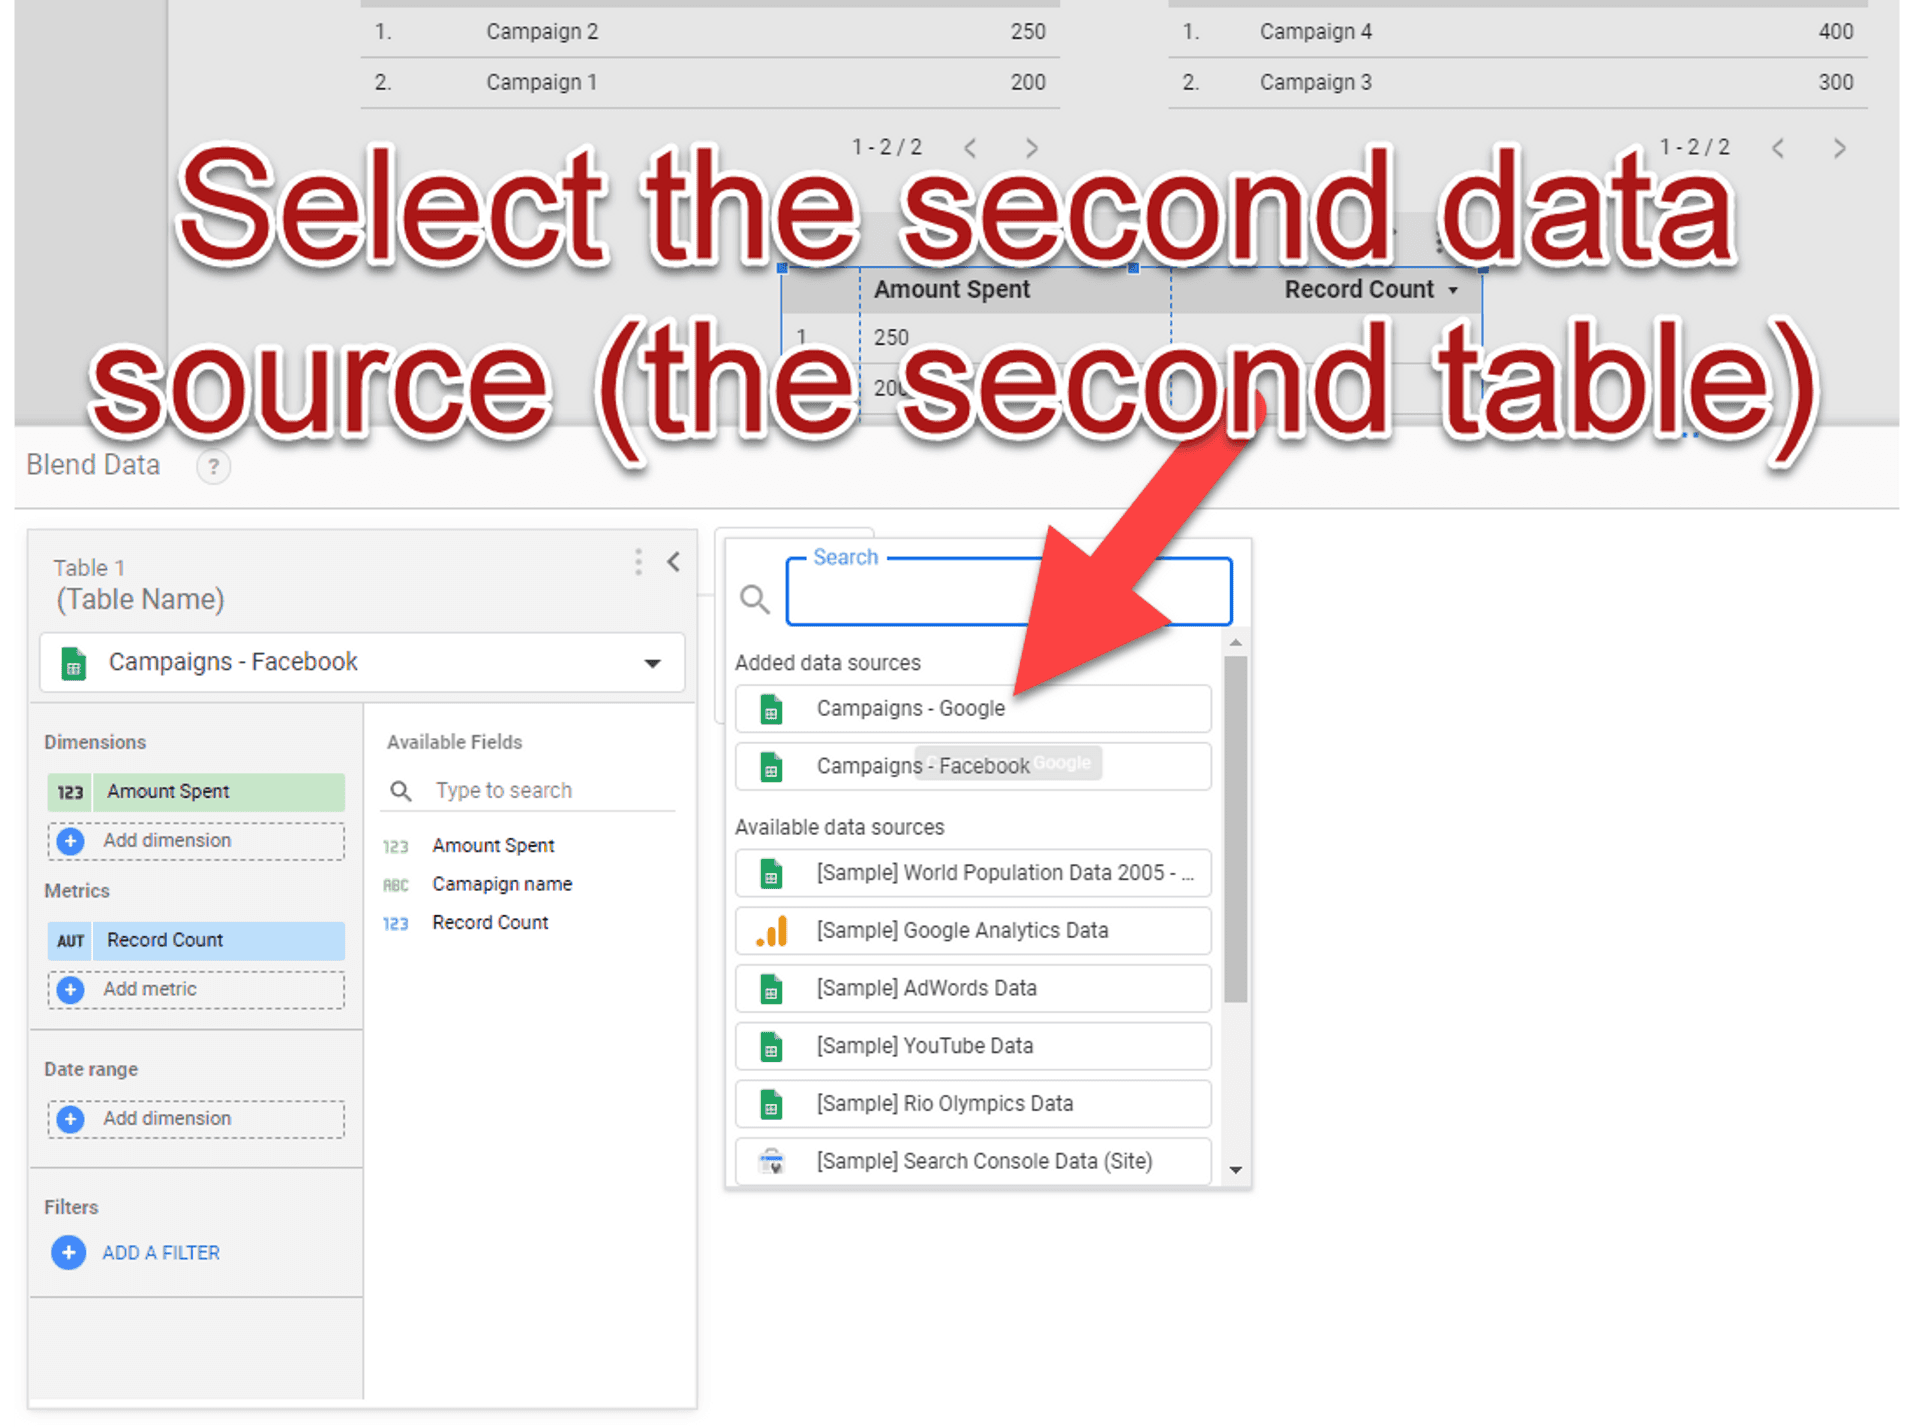
Choose second Table:
- Click Join another table to add the second data source (the second table).
Step 4: Select Fields for the Join
- Select the field from your primary table and the second table.
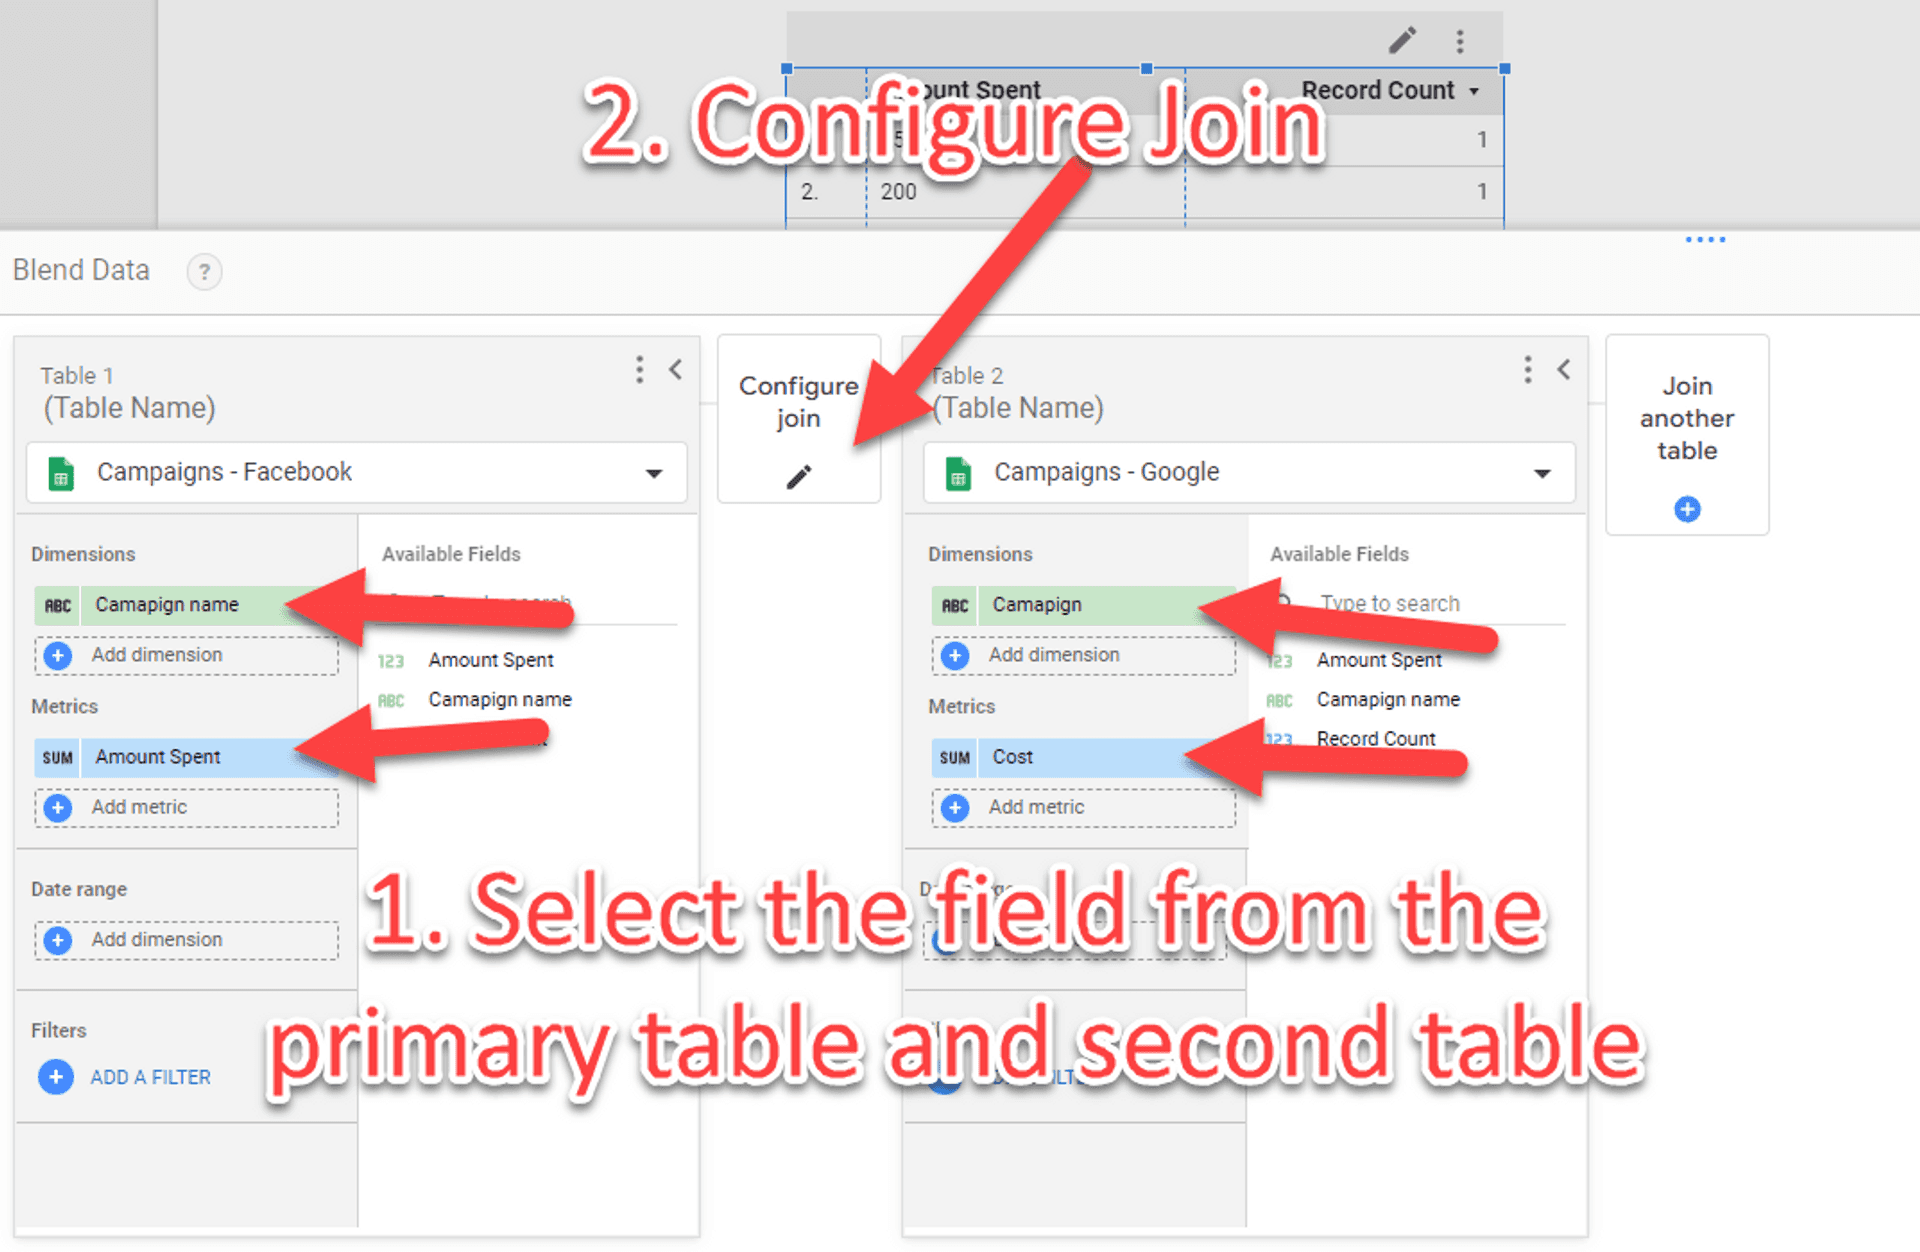
Step 5: Configure Join Type
Choose Join Type:
- Click Configure join to select the type of join.
- Choose Full outer join. This includes all records from both tables, combining matching data where available.
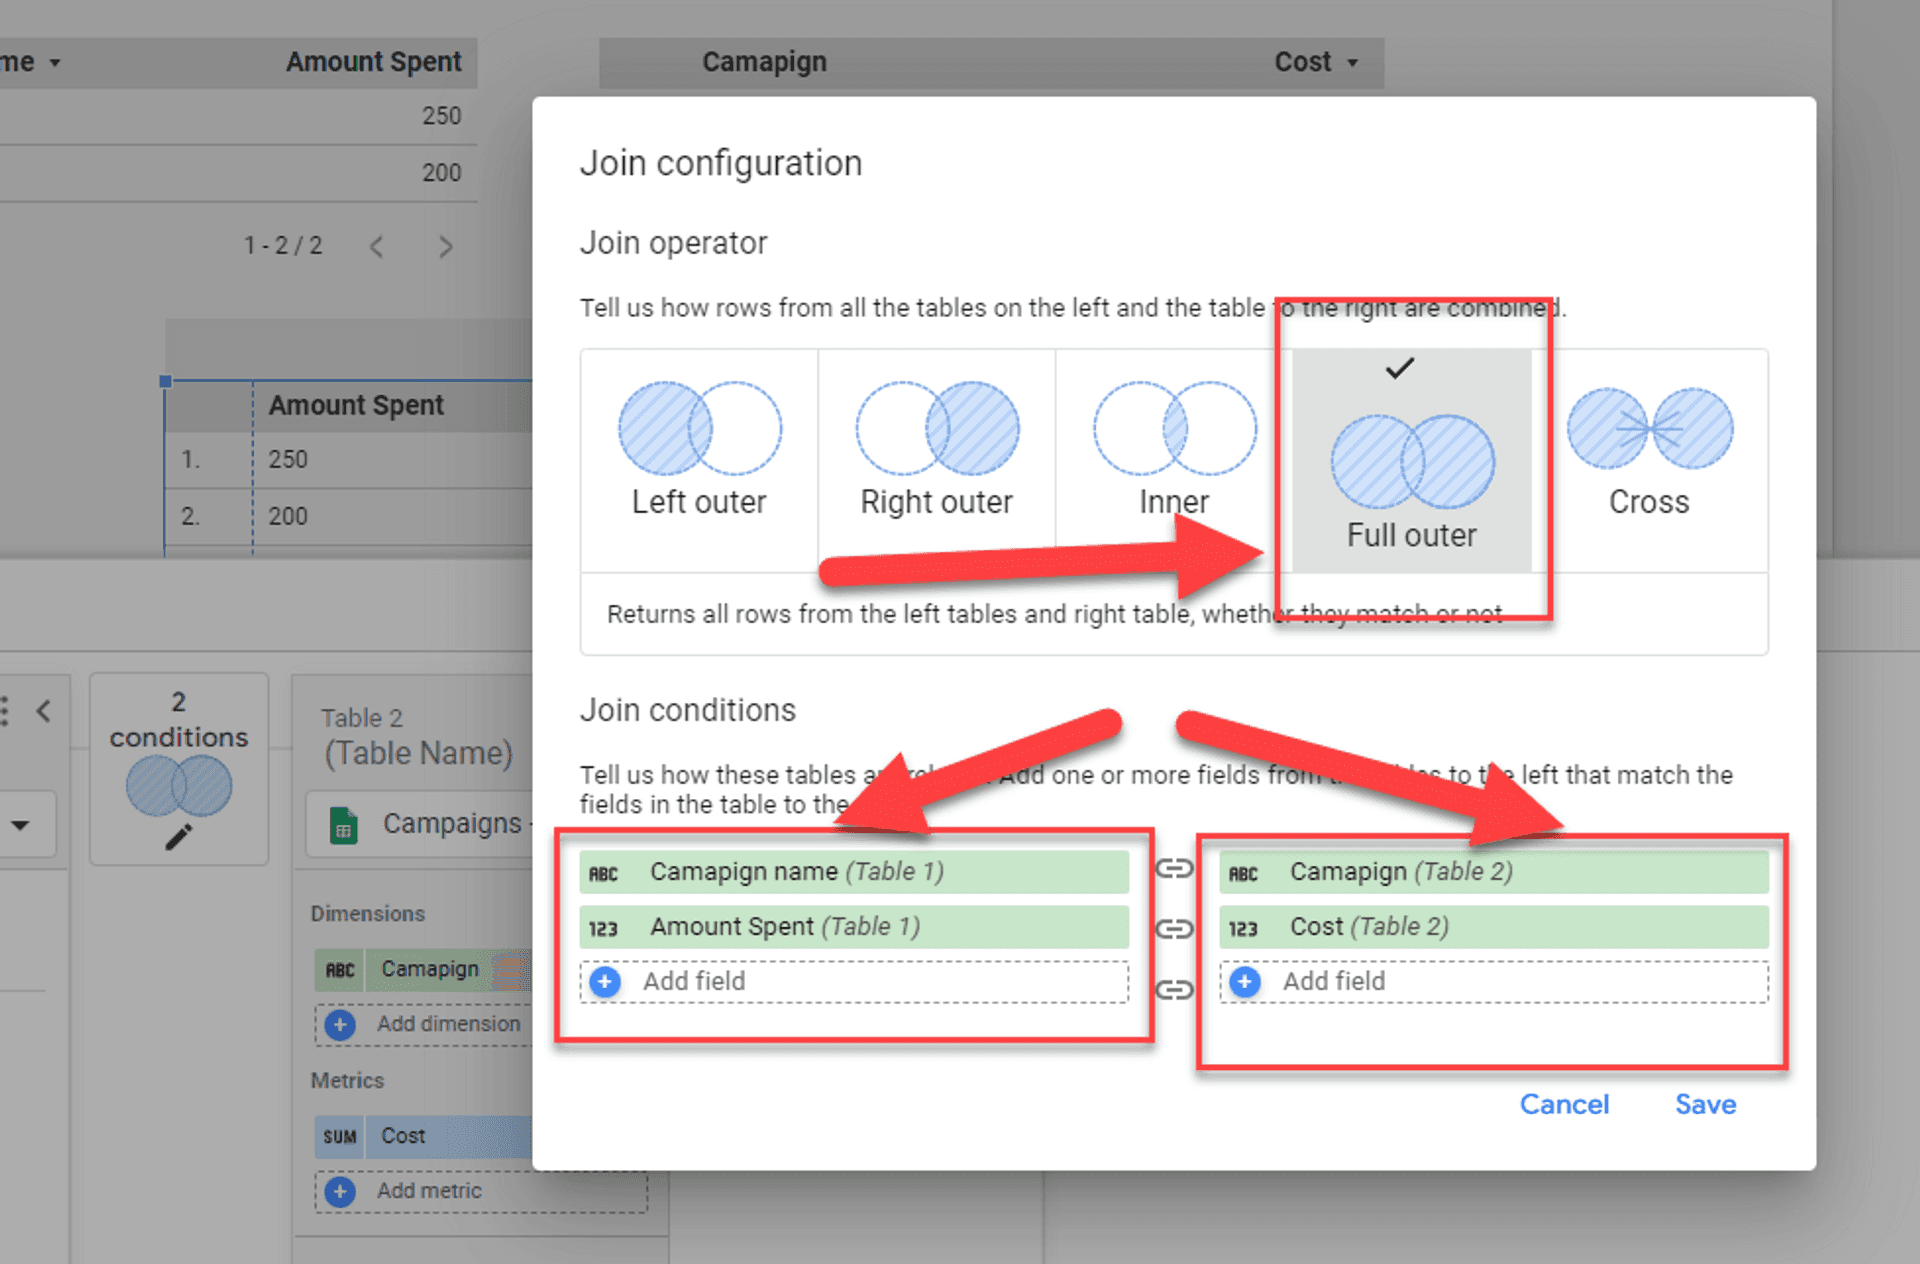
Save the Configuration:
- After setting the join, click Save to apply the blend.
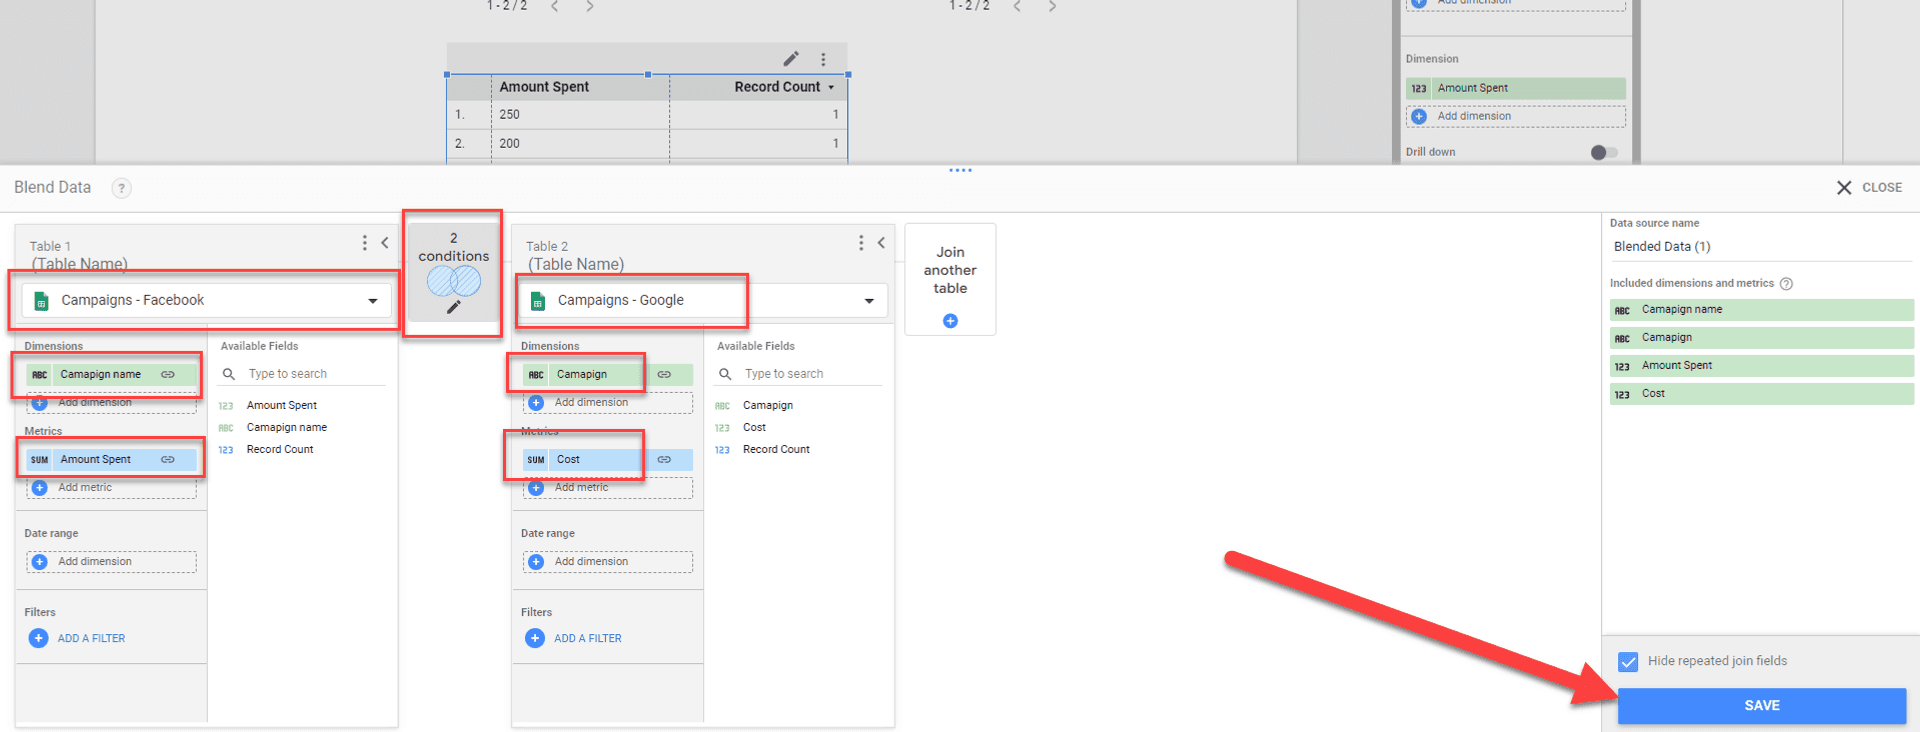
Step 6: Select Dimensions and Metrics
This step can actually be omitted, and we can go straight to adding the calculated fields, but it better illustrates the idea of merging the data.
Choose Dimensions:
- From both tables, select relevant dimensions Campaign, Campaign Name.
Choose Metrics:
- Select quantitative metrics to measure performance Cost, Amount Spent.
Check the Blended Data Table:
- Once the data blend is complete, review your new table to ensure the dimensions and metrics are displayed correctly.
Calculated Fields in Looker Studio
Calculated fields in Looker Studio allow you to create custom dimensions or metrics by applying formulas to your data. Here I will will walk you through applying a calculated field formula to both dimensions and metrics using the COALESCE function.
Step 1: Create a New Calculated Dimension
Open the Data Source:
- In your Looker Studio report, select the chart or table where you want to add a calculated field.
- In the right-hand panel, click Add a field to create a new calculated field.
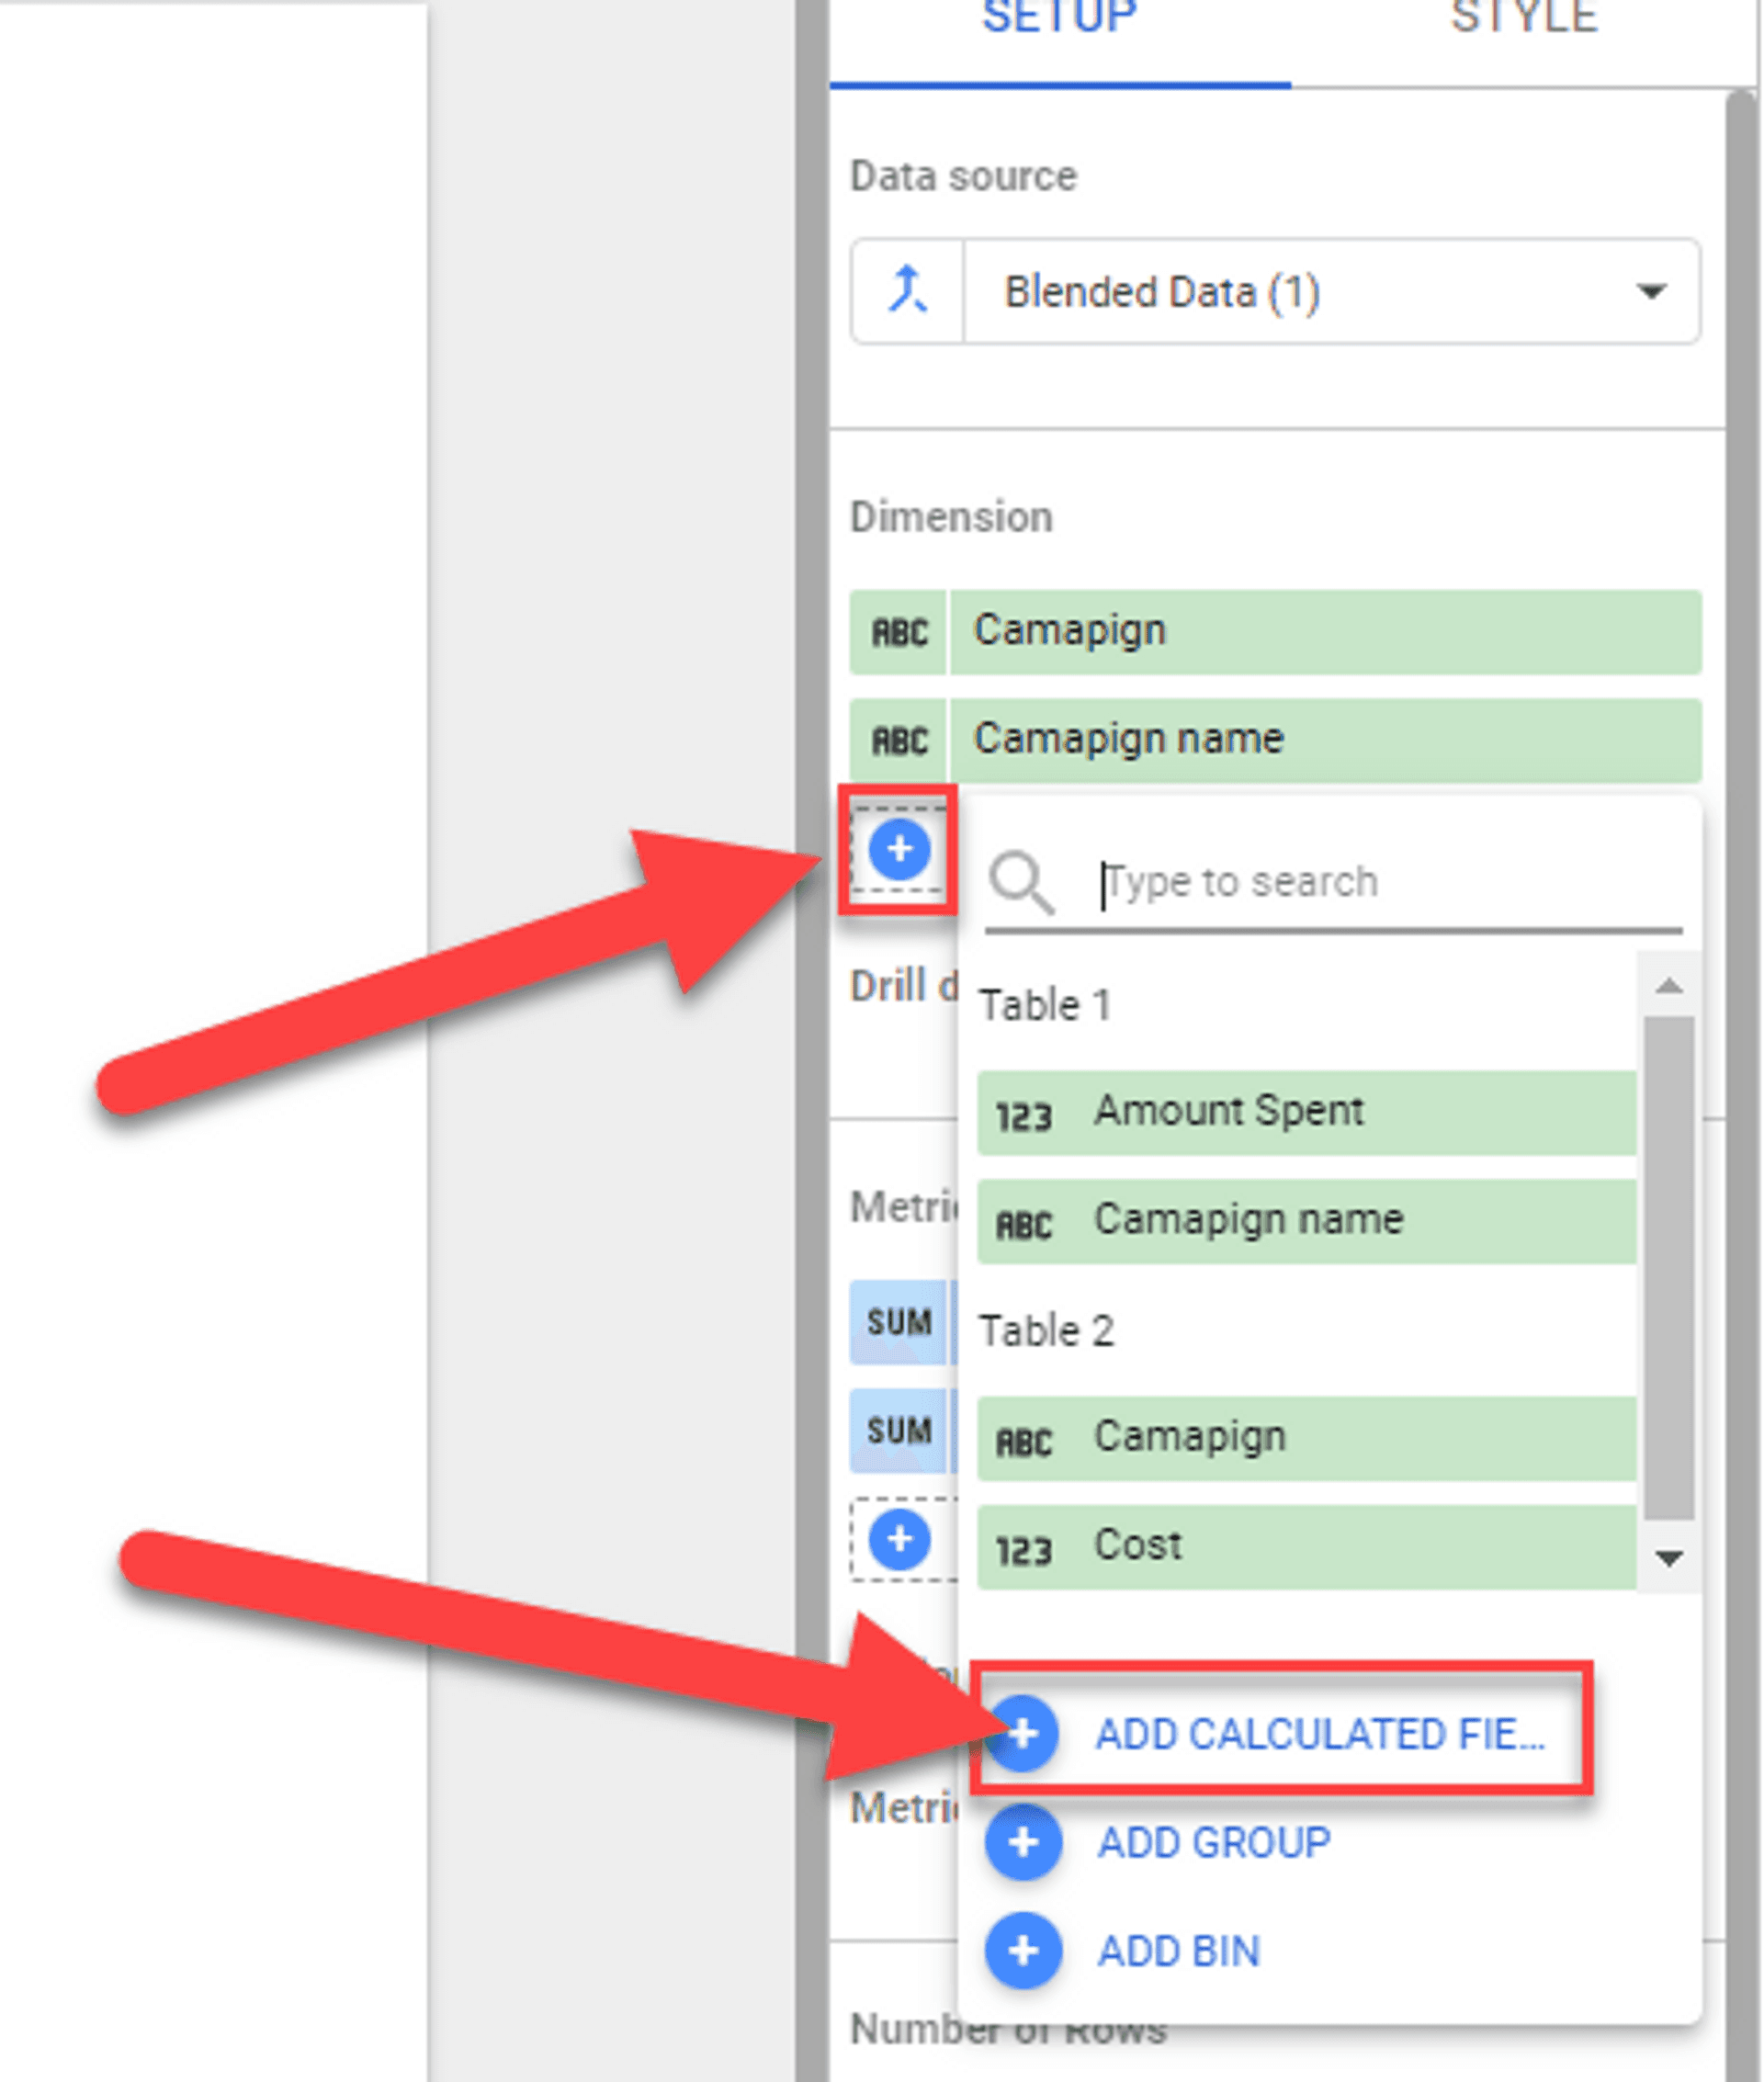
Apply the Calculated Field Formula:
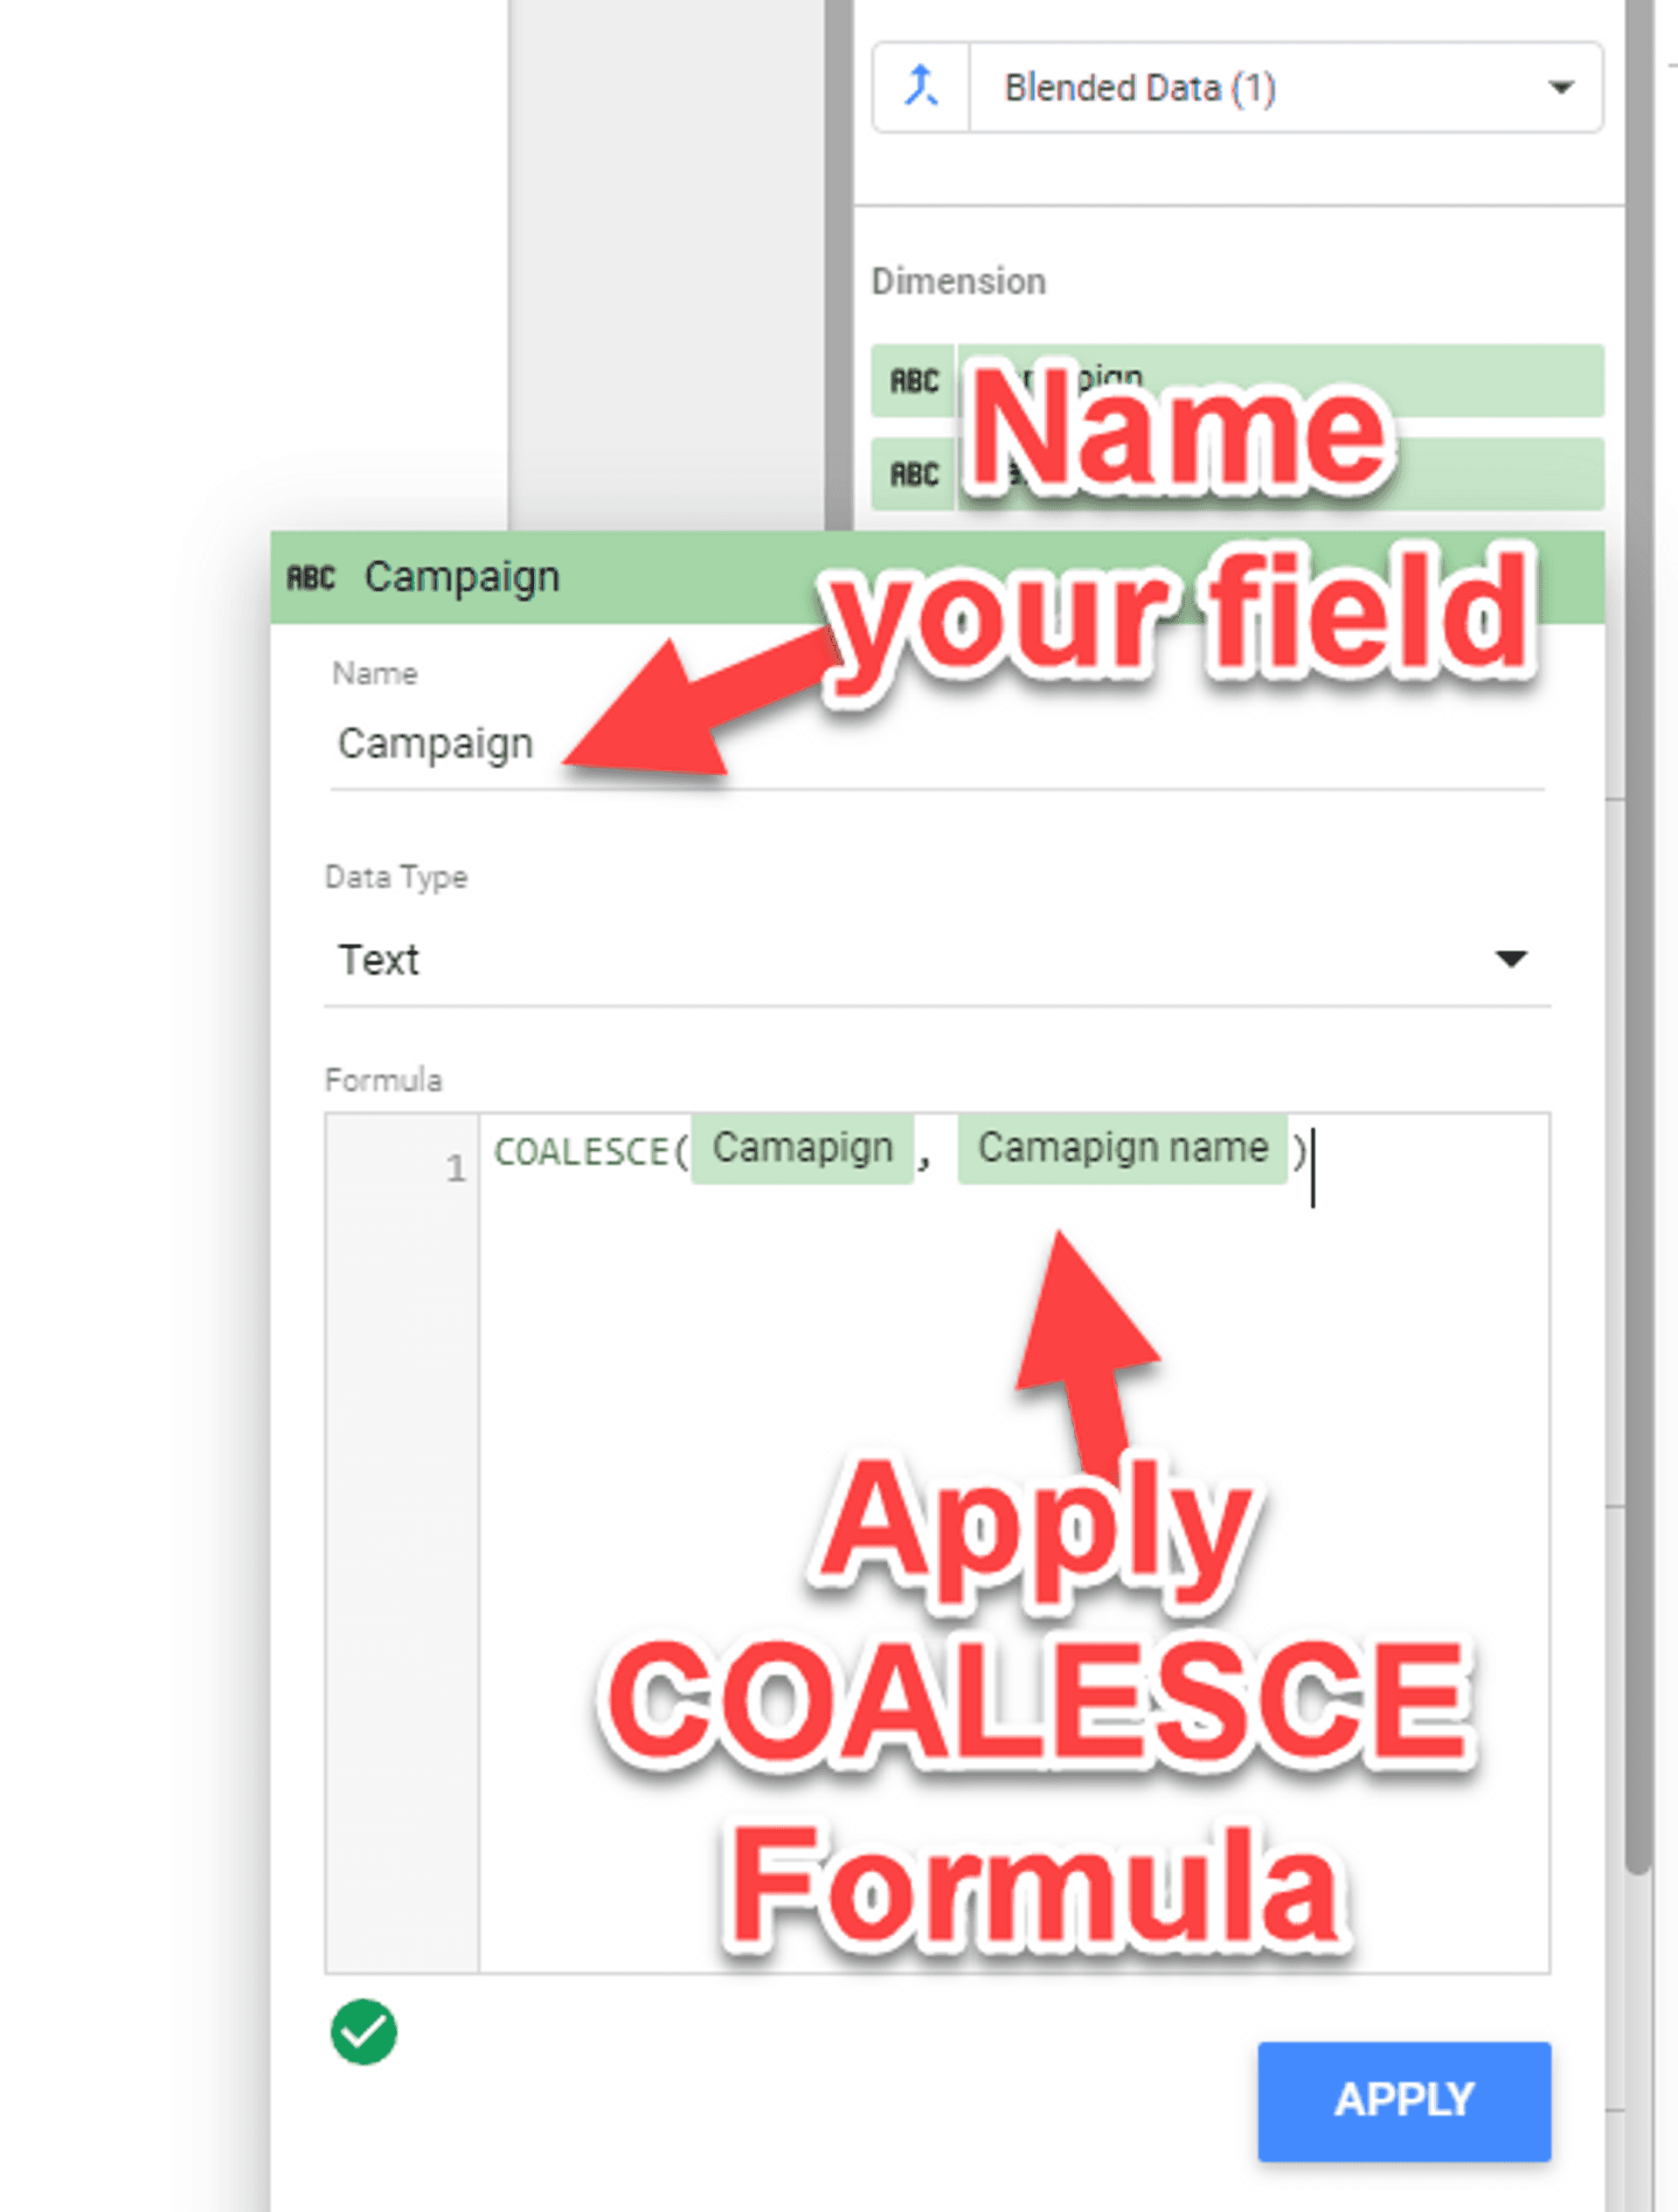
In the Name field, write the name of the new column (for example, Campaign Name).
In the Formula field, apply the following formula:
COALESCE(Campaign, Campaign name)
This formula will return the first non-null value between the fields Campaign and Campaign name.
Save the Calculated Field:
- Click Save to apply this new calculated dimension.
Step 2: Create a New Calculated Metric
Add Another Field for Metrics:
- In the same panel, click Add a field again to create another calculated field for metrics.
Apply the Calculated Metric Formula:
In the Name field, write the name of the metric (for example, Amount Spent or Cost).
In the Formula field, apply the following formula:
COALESCE(Amount Spent, Cost)
This formula will return the first non-null value between the Amount Spent and Cost fields.
Save the Calculated Metric:
- Click Save to apply this new calculated metric.
Step 3: Review and Adjust
Check the New Fields:
- Your new calculated dimension (Campaign Name) and metric (Amount Spent or Cost) should now appear in your data source and be available to use in charts and tables.
Customize and Use:
- You can now include these new fields in your visualizations, customize their appearance, or apply further transformations if needed.
If you're looking to enhance your skills with Looker Studio, I've got two more resources that might interest you. These guides will help you level up your data visualization and reporting workflows:
How to Add a Background Image in Looker Studio – Want to customize your reports with background images? This guide walks you through the process, offering a straightforward method to add a visual layer to your dashboards without the need for complicated workarounds.
How to Change a Page Name in Looker Studio – Organizing your reports is key to making them user-friendly. Learn how to easily rename pages within your Looker Studio reports to improve navigation and make your data more accessible.
These resources, along with the current tutorial, will help you get the most out of Looker Studio, whether you're working with Google Sheets or other data sources.
Let me know if you need any further clarification or help with specific parts of the process!
Published